Quick answer
If your phone supports eSIM and you want mobile data working as soon as you leave the terminal, buying and activating a Korea eSIM at Incheon Airport is usually the simplest option for a first trip.
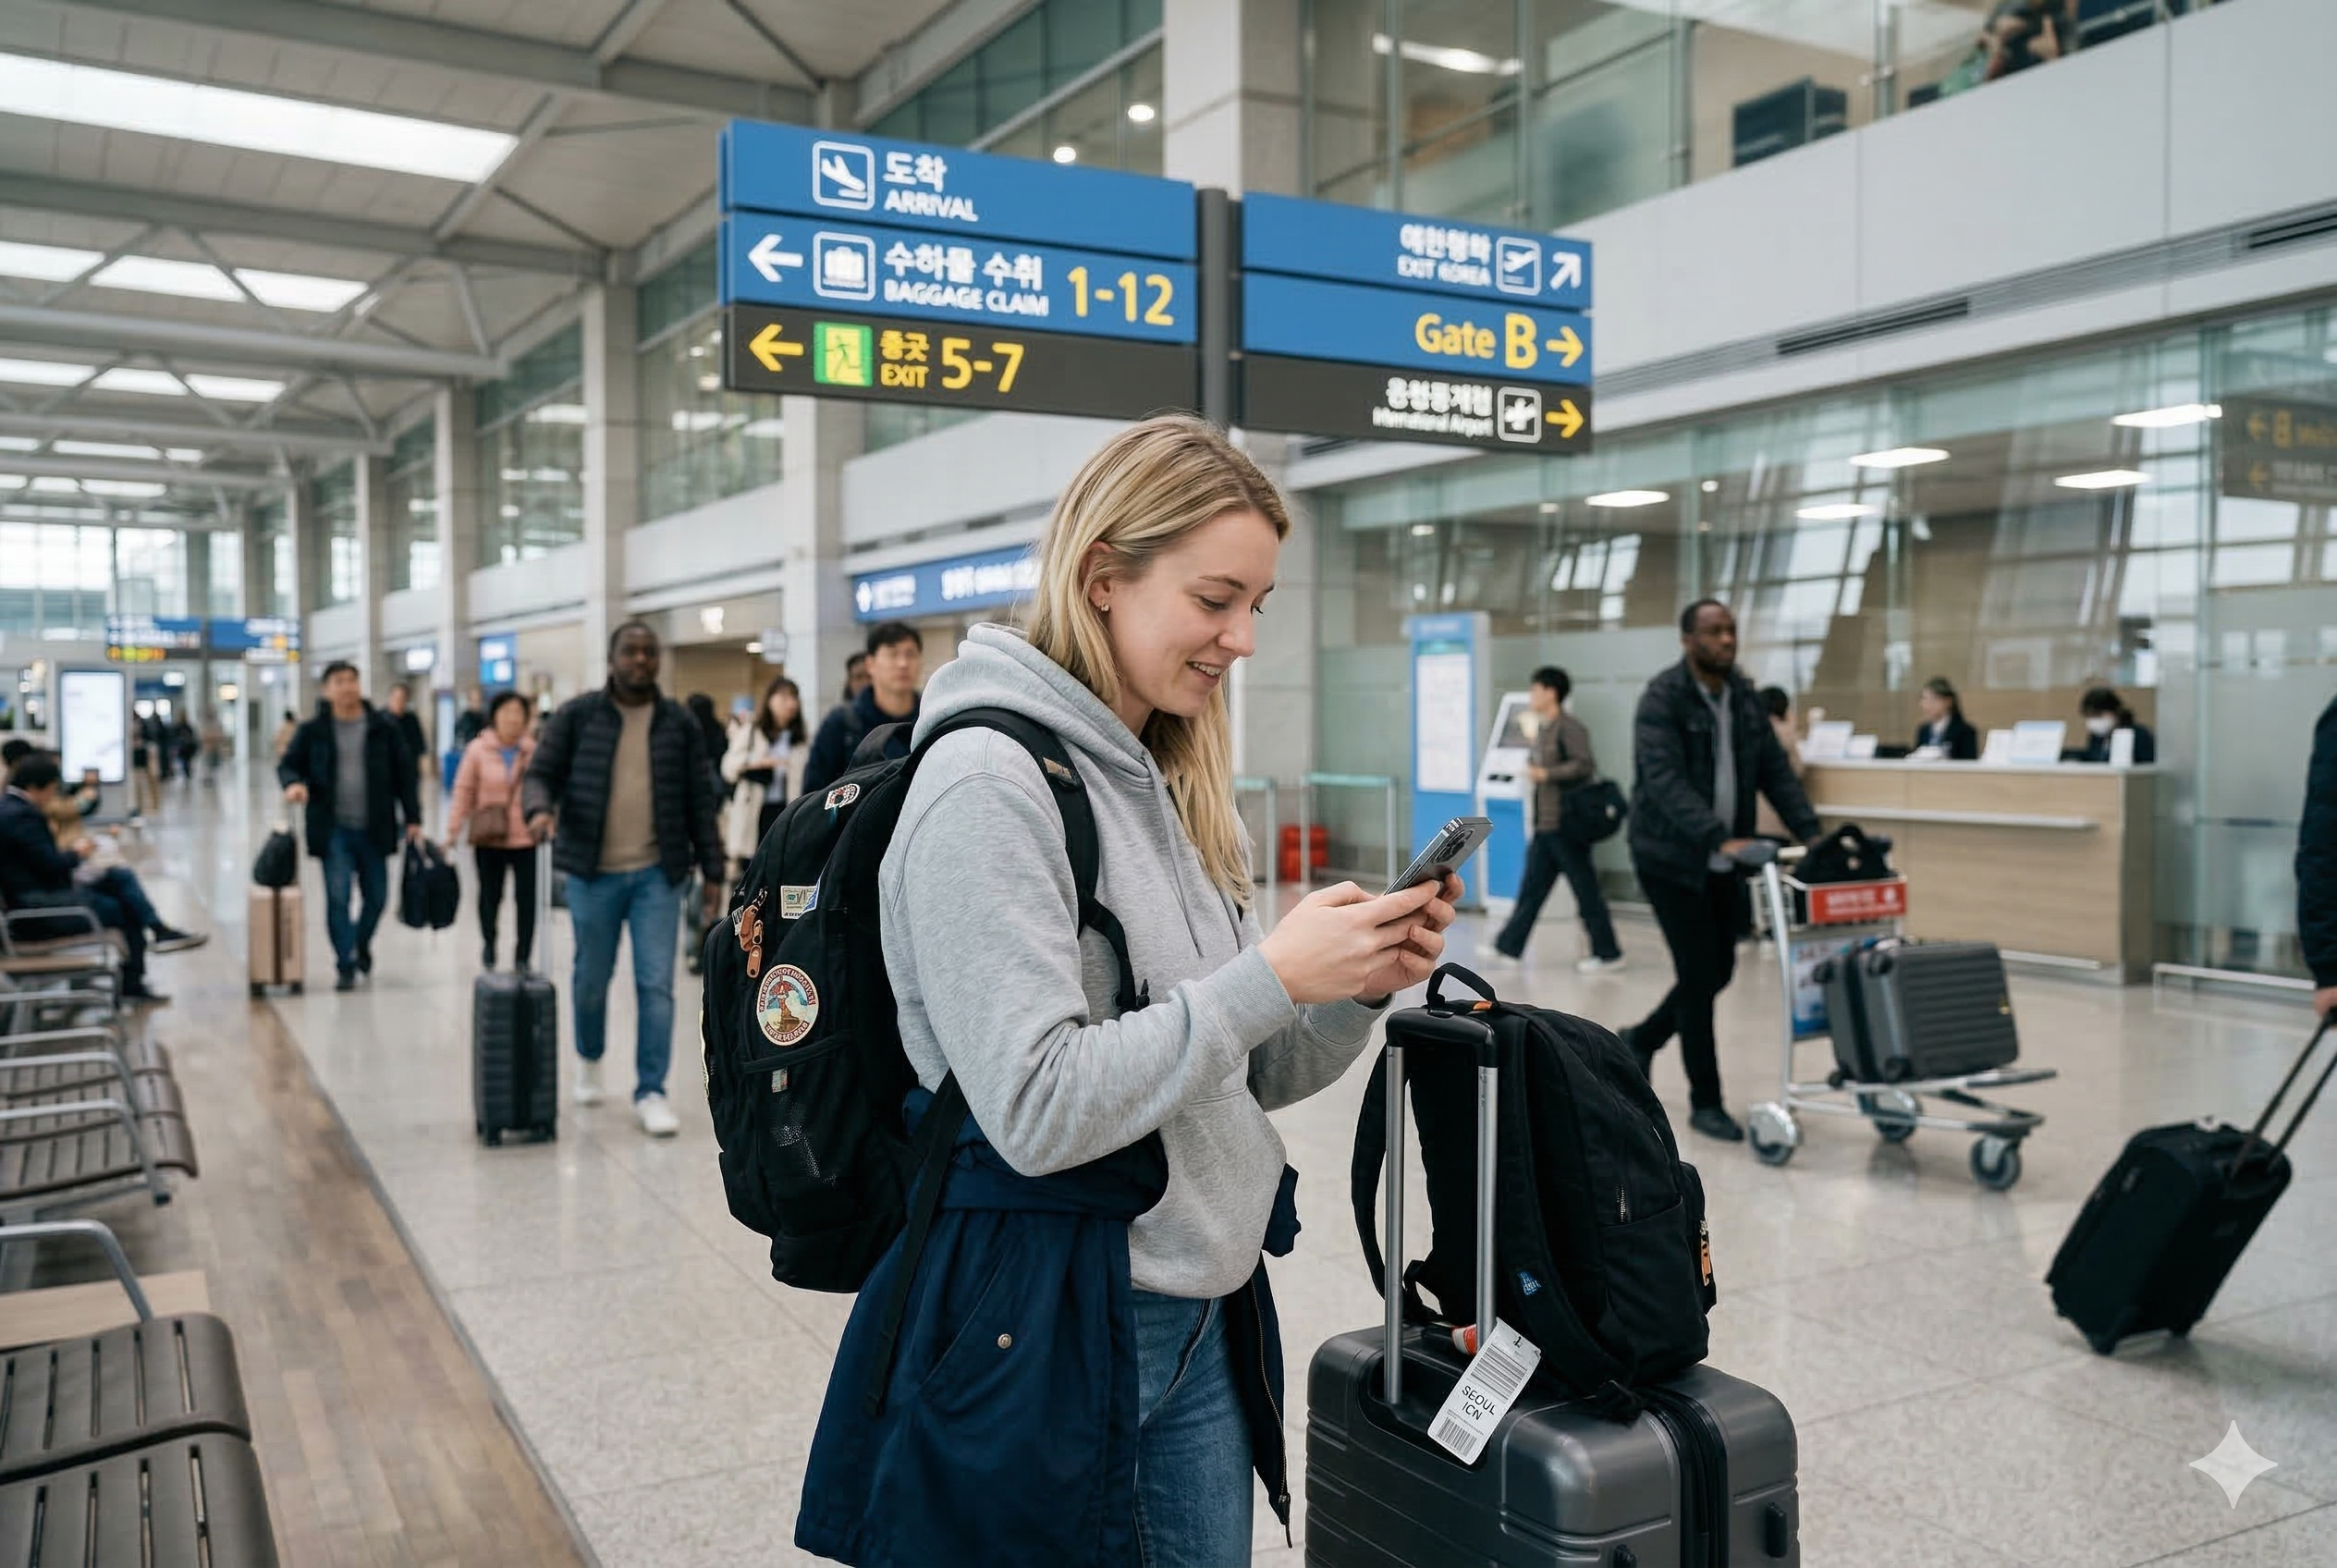
If this is your first time landing in South Korea, mobile data is one of the first things that can make or break your arrival experience.
Airport Wi-Fi is useful for a few minutes, but rarely enough once you start moving. The moment you leave the terminal, you may need to open a map, check the airport railroad schedule, message your hotel, or look up the right bus stop. That is why many travelers sort out their data connection before heading into Seoul.
For most people with a compatible phone, a Korea eSIM is the easiest option. You do not have to remove your physical SIM card, you do not need a SIM pin, and you can usually get connected in a matter of minutes. That convenience matters a lot when you are tired after a long flight and trying to figure out transportation in an unfamiliar country.
This guide covers what a Korea eSIM is, who should buy one at Incheon Airport, what to check before paying for it, how activation works, and the small setup mistakes that cause the most trouble for first-time visitors.
Best fit for this guide
- First-time visitors arriving at Incheon Airport
- Travelers using public transportation into Seoul
- People who need maps, translation, or messaging right away
- Visitors with an unlocked phone that supports eSIM
Why travelers often set up mobile data before leaving Incheon Airport
The first hour after landing is when having mobile data helps the most.
You may need to confirm whether you are taking the AREX, an airport bus, or a taxi. You may need to message an Airbnb host who does not reply through SMS. You may want to check whether your hotel is closer to one subway exit than another. Even something as routine as opening Papago, Naver Map, or KakaoMap becomes much easier once your phone is fully connected.
Many visitors assume they can rely on airport Wi-Fi until they reach the city. That sounds workable in theory, but it often creates friction in practice. Wi-Fi drops between areas, some apps behave poorly on unstable public connections, and the moment you step past the arrivals gate, the signal you were counting on can disappear. You end up trying to load directions with luggage in one hand and no reliable data in the other.
Buying and activating a Korea eSIM before leaving the airport removes one layer of uncertainty from the rest of the arrival process — and for a lot of first-time visitors, that alone is worth it.
What a Korea eSIM actually is
A Korea eSIM is a digital mobile plan that lets your phone connect to a Korean carrier without inserting a physical SIM card.
Instead of opening the SIM tray and replacing your current card, you install a mobile profile directly onto the phone. In most cases, that happens by scanning a QR code or manually entering activation details. Once installed, your phone can use the Korean network for mobile data while your regular number stays active on your main line — provided your device supports dual SIM use.
That dual-line setup is one of the biggest reasons travelers prefer eSIMs. You keep your home SIM in place for calls, banking verification, or backup access, while running a local data line for maps, browsing, and travel apps — no card-swapping required.
For a short trip, that arrangement is usually far more practical than juggling physical SIMs at the airport.
Who should buy a Korea eSIM at the airport
Not every traveler needs to buy an eSIM right after landing, but there are situations where doing it at the airport makes the first few hours noticeably easier.
It makes sense to set one up immediately if you are arriving late, taking public transportation into the city, traveling alone, or heading somewhere that may be tricky to find on a first visit. Those are the scenarios where stable mobile data pays off right away — not twenty minutes later when you finally find a café with Wi-Fi.
It is also the smarter move if you know you will be relying on maps, translation apps, and messaging from the moment you land. Seoul is genuinely easy to navigate once you are connected, but much less forgiving if you are piecing things together without data.
Some travelers can afford to wait. If your hotel runs a shuttle, if someone is picking you up, or if you arranged a roaming plan that works well in Korea, there is less pressure to buy a local plan inside the airport. Even so, many first-time visitors still prefer to handle it at Incheon — one less thing to sort out once you are already tired and somewhere unfamiliar.
| Buy at the airport now | You can wait |
|---|---|
| You need maps and messaging right away | You already have reliable roaming |
| You are taking public transportation into Seoul | Someone is picking you up |
| You are arriving late or traveling alone | Your hotel shuttle covers the entire arrival process |
| You want staff nearby if setup goes wrong | You already know how to activate eSIM plans yourself |
What to check before buying a Korea eSIM
The most common mistake travelers make is assuming every phone supports eSIM. It does not.
Before paying for anything, confirm whether your device supports eSIM at all. Many newer iPhones, Google Pixel phones, and Samsung Galaxy models do, but support can vary by model and by the country where the phone was originally purchased. A device that supports eSIM in one market does not always support it in another.
You also need an unlocked phone. If your device is tied to a home carrier, the eSIM may install but fail to connect — or may not install at all.
Access to your email matters more than people expect. Most airport eSIM purchases involve a QR code delivered by email, and if you cannot log in, if your email app is not syncing, or if you need a verification code sent to your home number, activation gets frustrating fast. It is worth checking your inbox setup before you even start the purchase.
Battery is another thing worth thinking about beforehand. Travelers often arrive with a nearly dead phone after a long flight, and a phone running low can delay updates, stall the installation, or simply make the whole process harder than it needs to be. Do not wait until you are at two percent.
Finally, keep your passport handy. Depending on the provider and plan type, identification may be required during purchase.
Check this before you pay
- Your phone supports eSIM
- Your phone is unlocked
- You can access your email without extra verification problems
- Your battery is not critically low
- Your passport is ready if identification is requested
Where travelers usually buy a Korea eSIM at Incheon Airport
Most travelers buy a Korea eSIM through one of three channels at Incheon.
The first is at a telecom or travel service counter in the arrivals area. This is the most straightforward route if you want staff to verify your phone’s compatibility, or if you would feel more comfortable having someone nearby while you install the profile.
The second is through a vending kiosk or self-service machine. These work well if you want something quick and do not need much guidance. When the staffed counters have a line, kiosks can move considerably faster.
The third option is a plan purchased online before departure, activated after landing. Some travelers prefer this because it cuts down on time at the airport, but troubleshooting is entirely on you if something does not work.
Availability can shift depending on your arrival time, which terminal you land in, and operational hours, so it is better to approach the airport as a place with several mobile data options rather than assume one specific counter will always be open. If you are not sure where to start, the airport information desk can usually point you in the right direction faster than wandering around will.
Airport purchase vs buying online before departure
There is no single right answer — it depends on how much you want to handle before the flight and how comfortable you are solving problems independently.
Buying online before departure works well if you already know your phone supports eSIM and you are confident about installation. You land, pull up the QR code, activate the line, and move on. Clean and efficient, when everything goes as expected.
Buying at Incheon tends to be the better call for first-time visitors who want a bit more reassurance. If there is a compatibility issue, if the QR code fails to install, or if your phone settings are confusing, having airport staff nearby makes the whole thing far less stressful. You also have someone to turn to if the activation email takes longer than expected to arrive.
Put simply: if you have done eSIM setup before and know your phone is compatible, buying ahead of time is efficient. First trip to Korea, first time using an eSIM — handle it at the airport.
| Buy online before departure | Buy at Incheon Airport |
|---|---|
| Faster if you already know the setup | Safer if this is your first time using eSIM |
| You troubleshoot problems yourself | Staff may be nearby if something goes wrong |
| Works best when compatibility is already confirmed | Better when you want more reassurance on arrival |
How to activate a Korea eSIM step by step
The exact wording varies slightly by device, but the process is generally straightforward.
- Complete the purchase first. Make sure you have the QR code or activation details ready. If the provider sends them by email, open that message before you touch any settings.
- Open your phone’s cellular or mobile network settings. Depending on the device, this may appear under Cellular, SIM Manager, or Mobile Data.
- Scan the QR code. Your phone will begin downloading the eSIM profile. This usually takes only a minute or two if the connection is stable.
- Label the new line clearly. If your phone allows custom names, something like “Korea eSIM” keeps things simple when two lines are active.
- Set the eSIM as your active data line. This is where many travelers slip up. The profile installs, but the phone still routes data through the original SIM.
- Check whether data roaming needs to be enabled. Some plans work without changing that setting; others require it.
- Test the connection before leaving. Open a browser, load a map, and search for a route. A finished installation screen does not always mean a working connection.
The most common eSIM setup issues at the airport
Most problems are minor, but they can feel much bigger when you are standing in arrivals with luggage and no idea why your phone is not connecting.
The QR code email not appearing where you expect it is probably the most frequent one. It lands in spam. It goes to an inbox you do not usually check on your phone. Or the purchase confirmation arrives immediately while the actual activation email follows a few minutes behind — and people start panicking and rescanning before the email has even arrived.
Another common scenario: the eSIM installs without errors, but there is still no internet. The phone is still using the original SIM for data. Switching the data line manually in settings fixes it almost every time.
Starting the installation on weak public Wi-Fi is another issue worth knowing about. If the connection drops partway through, the process can stall or fail. Moving closer to a stronger signal — or asking staff for help — before trying again is better than repeatedly attempting the same thing on an unstable connection.
Low battery causes more problems than people anticipate. A phone running on fumes can delay updates, shut down mid-activation, or simply make an otherwise simple process feel like a crisis.
And if the phone does not support eSIM at all, no amount of rescanning will change that. Compatibility is the one thing worth confirming before purchase, not after.
Most common problems
- The QR code email has not arrived yet or went to spam
- The eSIM installed, but the original SIM is still set as the data line
- The setup stalled because the Wi-Fi signal was weak
- The phone battery is too low during activation
- The device does not support eSIM in the first place
A practical note on iPhone and Android differences
Both platforms handle eSIM setup well, but the menus look quite different from each other.
On iPhone, the process tends to be clearly laid out and easy to follow as long as the QR code is valid. On Android, the experience can vary considerably depending on the manufacturer and software version. Samsung, Google Pixel, and other brands may place the eSIM settings in different spots within the menus — sometimes several layers deep.
That does not make Android harder in general. It just means the step-by-step tutorial you found online may not match your actual screens if you are using a different phone model.
The fix is simple: before your trip, search your exact phone model plus “add eSIM” and confirm where that setting actually lives. One minute of checking now can save a lot of confusion at the airport.
eSIM vs pocket Wi-Fi for first-time visitors
Some travelers still weigh up whether to get an eSIM or rent pocket Wi-Fi at the airport.
Pocket Wi-Fi has its place. For families or small groups traveling together, sharing one connection across multiple devices can make sense. It is also a workable fallback for people whose phones do not support eSIM.
For solo travelers and most couples, though, eSIM is the simpler arrangement. No extra device to charge, nothing extra to carry, no rental counter to visit on the way out of the country. And if you misplace the pocket Wi-Fi unit or forget to charge it overnight, every device depending on it goes offline at once.
For first-time visitors who want less to manage on arrival, eSIM is generally the cleaner option — provided the phone supports it.
| eSIM | Pocket Wi-Fi |
|---|---|
| No extra device to carry | Useful for families or small groups |
| Best for solo travelers and most couples | Can connect multiple devices at once |
| No return process at the end of the trip | Must be charged and returned |
| Requires phone compatibility | Useful if your phone does not support eSIM |
How much data most travelers actually need in Korea
People tend to overestimate how much data a short trip requires.
If your usage mostly involves maps, messaging, email, browsing, and the occasional translation app, consumption will likely be fairly moderate. Upload videos constantly, stream high-resolution content, tether to a laptop, or work remotely while traveling, and you will need significantly more.
For a typical tourist trip, the more useful question is not what the largest available plan is, but how you will actually be using your phone in Korea. A heavier plan only makes sense if your habits justify it.
This matters because airport purchases tend to happen when you are tired and moving quickly. The default instinct is to grab the biggest plan to avoid any risk of running out — even when a mid-range plan would have covered the whole trip without issue. A minute of honest self-assessment before you pay is usually enough to avoid that.
Simple rule of thumb
If you mainly use maps, messaging, browsing, and translation apps, you may not need the biggest plan available. Heavy streaming, constant uploads, tethering, and remote work change the calculation.
What to do right after your Korea eSIM starts working
A working installation screen is not the finish line.
Open your navigation app and confirm that routes are actually loading. If you are heading into Seoul, look up the route to your accommodation before you leave the terminal — not while you are already on the platform trying to figure out which train to take.
Test a messaging or email app as well. Send a message, pull up your hotel booking, or load a confirmation email. That quick check tells you the connection is working in a real-use context, not just that the profile installed without error messages.
If public transportation is part of your plan, this is also the moment to connect the rest of your arrival logistics. Data, maps, and transport decisions all feed into each other. Getting the connection sorted before leaving the terminal tends to make everything that follows run more smoothly.
Do this before you walk away
- Open your map app and confirm routes load properly
- Test messaging or email
- Check your route from the airport into Seoul
- Make sure the new eSIM is actually handling mobile data
Is it worth buying a Korea eSIM at Incheon Airport?
For most first-time visitors with a compatible phone, yes — and the reasoning is fairly straightforward.
You land, connect, open the apps you actually need, and handle the rest of your arrival without gaps. You do not have to wait until you reach the city to figure out how you are getting there.
The airport is not the only place to buy a Korea eSIM, and it is not always the cheapest. But for travelers who want convenience and a cleaner first few hours in the country, it is often the most practical place to get it done.
The main thing is not to rush the setup itself. Check compatibility before you pay, confirm the phone is unlocked, keep your email accessible, and test the line before walking away from the counter or kiosk. Do that, and what can feel like a technical hurdle on a long travel day becomes a fairly forgettable ten-minute task.
Final takeaway
If you have a compatible unlocked phone and want a smoother arrival, setting up a Korea eSIM at Incheon Airport is usually worth it. The key is simple: confirm compatibility, keep your email accessible, and test the connection before leaving the terminal.